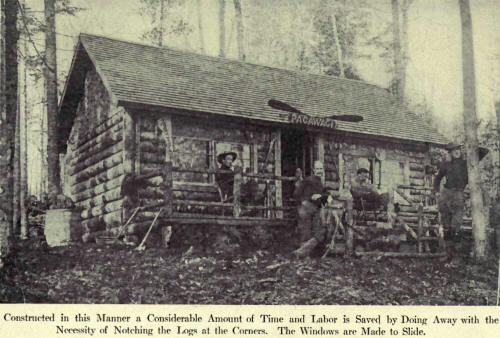
|
CUT four stakes. Now,
when you have decided upon the exact position you wish your building to
occupy, drive one of the stakes at a corner. Measure the width of the
building and drive another stake, and stretch a cord between the two.
Then at a point as nearly as you can judge at right angles to this,
measure off the length of the cabin and set the third stake. Now two
more measurements of length and width from the first and last stakes set
will give you the approximate position for the cabin.
Inside these stakes, and
on the line laid down, you will build four temporary piers, either of
stones or of logs, of about the height you desire the building above the
ground, remembering that the floor will be six to eight inches higher.
Put your sills together
on top of these supports, and begin to level them. For this purpose you
will require a straightedge about twenty feet long. Make it by nailing a
couple of boards together that are about six inches wide, and long
enough, of course, to give the desired length. Rest the straightedge
upon the two parallel sills, and be very sure to place your level on the
center of the straightedge, for this will sag some, and the sills may
then be blocked up until they are level.
The sills are now to be
set square. To do this, snap a chalkline down the center of two
adjoining logs. From the corner measure six feet on one log and eight
feet on the log at right angles. Then, with a ten-foot pole laid across
to these points, push or pull the logs until the two ends of the pole
exactly touch the six- and eight-foot points. Your building will be
square, and the sills should be spiked together. Try the level once
more.
Lay the foundation on a
firm basis. You will probably have to go below the loam or upper crust
of earth to the hard gravel beneath. Secure flat rocks, if possible, and
if your piers (which should be every four feet) are built of them, be
absolutely sure that each rock rests firmly and with no "teetering" on
those beneath. Break the joints carefully. "If a rock doesn't fit, turn
it over," is an adage of the stonelayer. It will usually be the
solution.
Perhaps wooden posts
would be better. These will last much longer if their ends rest upon a
rock. But bear this in mind, a rock in contact with the earth will sweat
and the moisture would in time rot the posts. This is easily avoided by
using two rocks, one on top of the other. The upper rock will never
sweat. Cedar posts are best, though other soft woods, as pine, hemlock,
etc., will do; the hard woods are not so durable. Treating posts to a
good application of creosote will add much to their life.
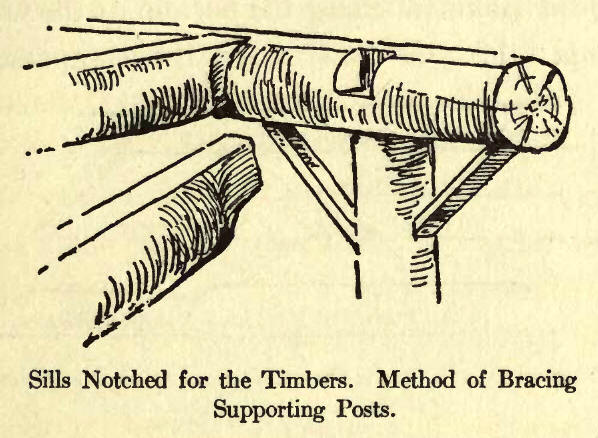
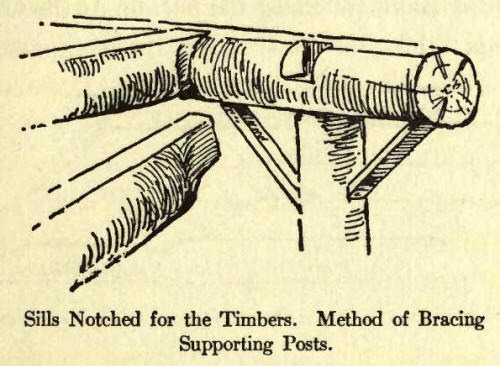
When the supports are all
fitted and in place they should be braced by two pieces running from the
posts to the bottom of the sills. The temporary piers may be taken away
when a sufficient number of the permanent piers are in place.
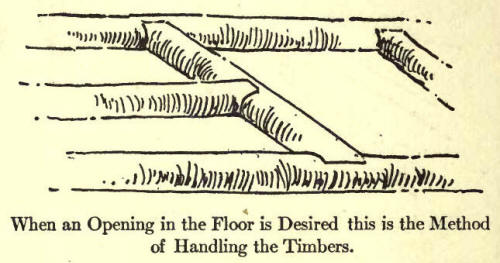
Divide the length of the
cabin as nearly as possible into spaces of about eighteen inches and
mark off these divisions on the long sills; this gives you the position
of the floor timbers.
The sills should now be
notched to receive them. The notches may be two or two-and-a-half inches
deep, measuring from the top of the log, and about four inches across.
The floor logs must be
squared on one side, and each end cut down to fit the size of the
notches in the sills. Thus you will have an absolutely level floor, in
spite of the fact that the logs used for timbers are of varying
diameters.
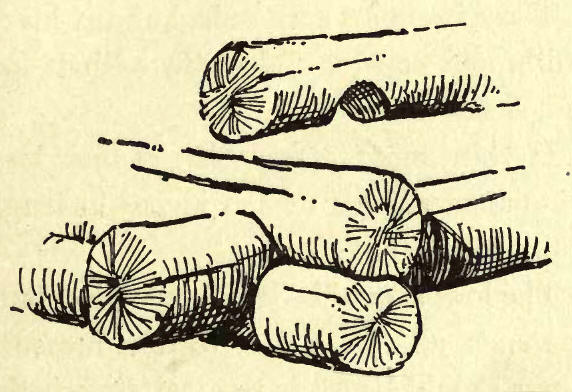
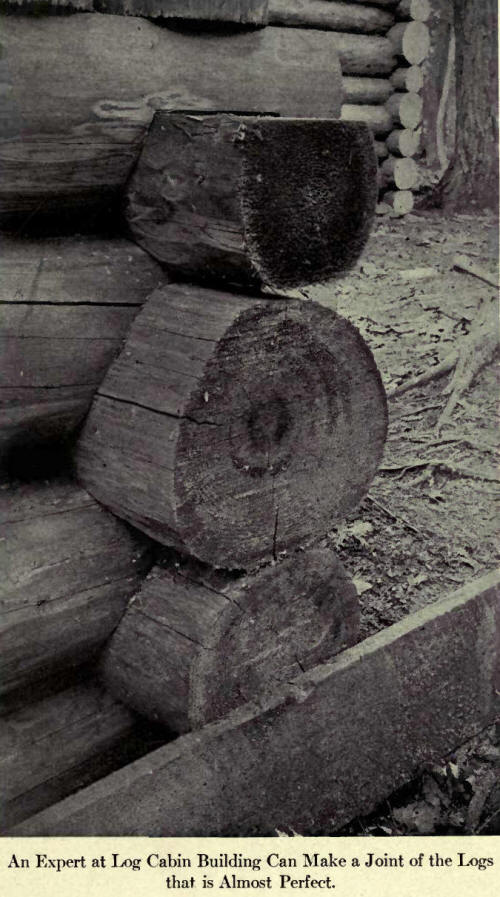
Now you are ready to
begin on the walls. Put your first log in place and mark it for the cut
for the under log, leaving at least one foot or fifteen inches of the
log to project at either end outside of the building. This can best be
done with a pair of compasses, set the depth of the intended cut.
Holding the compasses so that one point is directly over the other, let
one point rest against the side of the bottom log, the other point
touching the bottom of the top log. If you now move the compasses
slowly over the bottom
log, the upper point will mark the exact shape of the cut to be made.
This should be done on two sides of the log. When the operation is
completed, take the log down and turn it bottom side up to make the
notch. The notch is always, of course, on the bottom to prevent the
water from getting in and rotting the log. The notch should be slightly
scooped out in the center, so that the outer edges may be brought to a
joint. The log is now put in place and, if it fits properly, may be
fastened to the -under log by a spike driven through the corner.
On a long reach on the
sides of a larger building (eighteen feet or more) the logs should be
fastened together by an additional iron pin, driven through about the
center of the logs.
It will often happen that
the poles are not straight; you may force the bend out of the log by
means of the cant-dog. Therefore, if the upper log is to be pulled in,
set the hook in the upper log, with the point resting on the lower one.
Now pull on the lever and the log will be forced into place. Then drive
your iron pin.
These iron pins may be
had of any blacksmith, and consist of lengths of half-inch rod,
sharpened at one end.
If your logs are six
inches at their largest diameter, pins of ten inches in length will be
about right.
The logs should be laid
alternating butts and ends, and from time to time measurements should be
made to ascertain whether the four walls are going up of equal heights.
If not, look through your logs and select those of larger or smaller
diameters, so that the difficulty may be fairly met.
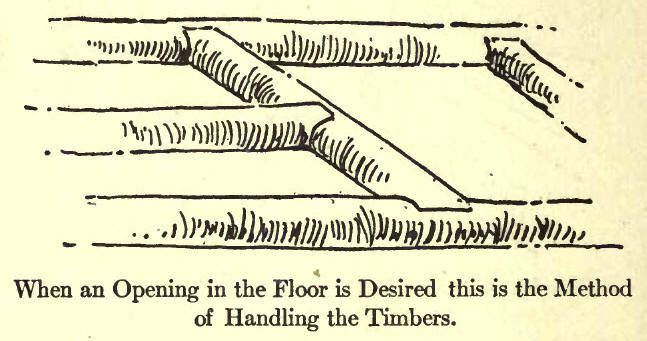
When you reach the height
of the windows and doors, make two saw cuts in the last log and almost
through it. This leaves an opportunity for the further sawing when the
time comes. It would be disastrous to make the openings now, for the
corners of the building would be left entirely unsupported.
You will have found it no
easy task to raise the heavy logs into position; as the walls rise, the
difficulty increases. You will need skids on which to roll the logs up,
and these are merely two logs laid from the ground to the top log. Lay
the new log at the foot of these. On the upper log of the cabin fasten a
rope opposite each skid. Carry the ropes down and around the ends of the
log to be raised and back again to the top log. The log may now be
easily drawn up by means of the ropes. |